 |
| My Lightbox |
Do you want to know how to take great pictures?
Have you ever wondered how to get those crystal-clear white backgrounds?
A lightbox is exactly what you need. They let you control the lighting and environment that your photos are taken in. They are especially good because they diffuse the light!
Fancy lightboxes are available for hundreds of dollars, but a simpler and effective lightbox can be made with materials around the house.
Supplies you will need:
- A destroyable box. I used a "book size" moving box. Make sure that your box is the appropriate size for the items you will be photographing.
- A lamp. Preferably two or more. "Natural light" lightbulbs are supposed to be the best, but I just use a florescent one. Detachable camera flashes and bright room or outdoor lighting work well, too.
- Clear velum paper. I used tracing paper. Tissue paper and thin papers can also work.
- A ruler.
- Scissors. I also used one of those rolling knives. Cardboard can be hard to cut.
- Tape.
- White poster-board or larger sheets of white paper.
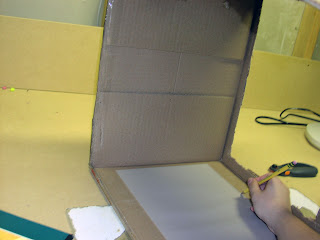
Cut an entire side off of the cardboard box. This will become the bottom of the box, the part that lies on the table.
Tip: Don't break your knife while doing this.
Next, trace a sheet of the velum paper on one side. Cut out that rectangle.
Repeat for 3 sides.
^I made the far side pictured (the top of the finished box), larger than my sheet of paper. I simply used Scotch tape to combine two pieces of paper into a larger one.
Tape the velum paper so that they cover the holes.
(The box is pictured upside-down here).
I turned the box right-side up for this picture.
Tape a piece of white poster-board to the top back of the lightbox.
Here is a picture of the finished lightbox!
Set up a lamp to shine through the velum paper. I use one fluorescent light shining through the top for most of my photos.
Hold the camera steady. It's a good idea to use a mini-tripod or a box to set the camera on.
{ Check out my tips for adjusting your camera settings to make the most out of your lightbox. }
The big rule with a lightbox is NO FLASH unless it is indirect and shining through the velum paper.
The big rule with a lightbox is NO FLASH unless it is indirect and shining through the velum paper.
I kept the flaps on the box so that I can control any lighting coming from the front of the box.
[IMAGE]
You can use multiple lamps for lighting from different angels.
It can be hard to edit such photos. ---->
[IMAGE]
Do you like to have that "rainbow background" effect? Place your object near the end of the lightbox, where the diffused light hits part and the lighting of your environment hits other parts. [IMAGE]
[IMAGE]
Use props! Everything from cups to fabric scraps to colored scrapbook paper will work wonders.
[IMAGE]
Having the hole in the bottom of the lightbox lets you use natural backgrounds.
Here you can see what the inside of my lightbox looks like. I used 2 pieces of white scrapbook paper.
Notice how the light from the lamp is diffused-- and how well the light bounces around the box!
When light is diffused, it is essentially scattered. It is not as harsh. It's pretty much what clouds do to the sun.
When light is diffused, it is essentially scattered. It is not as harsh. It's pretty much what clouds do to the sun.
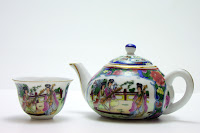
A photo taken from my lightbox.
Questions or tips? Please leave a comment!
Did YOU make this project? Please share a link! I'd love to see your lightbox and pictures you took with it!


