On My Workdesk Wednesday

This is WOYWW #269 (and the second time I've participated) and if you want to see the workdesks of other artists and crafters, check out the linky here!

This Wednesday, my workdesk looks like:


Yup, it's not my workdesk at all!

It's actually the dining room table, but we call it the game room table on account of the fact that the only time we eat here is when guests or over or when we have desert while playing a game. My family is addicted to board games. This morning we are setting up for a tournament of Catan and Ticket to Ride with some of my brothers' friends.

Last night I got the itch to do some design work, so today's workdesk consists of my laptop!

(And by last night I mean that I sat down at eleven o'clock to check my email, got sidetracked with ideas, and didn't go to bed until one-thirty.)

I haven't updated the graphics and code on my blog since... well, I made the graphics in 2010 and did some fiddling with the code early last year to make it a bit cleaner. You'd think that someone who is starting her Graphic Design studies this semester would have kept her blog design better updated. My problem is that I have wild ideas that I never have time to implement, and that I don't want to change the graphics all the time because it's best when people actually recognize my blog if they come back.

Last night, though, I decided that enough is enough and I wanted a cleaner, more professional look. A few hours later and we have...


BEFORE AND AFTER SHOTS! Yes! My blog's design is finally updated! 

I'm a little sad to get rid of the fairytale swirlies on the side of the blog, but the background image I used to get the swirlies there wouldn't load on all computers (and on one friend's computer, the swirlies covered up the text because her monitor is a strange resolution). Plain colors are safer.

My idea was to create a more modern, streamlined, and brighter look, without going all-out minimalist. Plain white backgrounds work really well on some blogs, my my blog has always needed a little more flair and color than that.

Keeping the Faerie logo as-is was a tough decision. I made it the same year I got my graphics software, the same year we moved to our wonderful house, and the same year I started my sophomore year of high school. FOUR YEARS AGO. Gosh, I'm old.

The way that the Faerie is sitting is just... awkward to me. However I couldn't bring myself to redo it since I like to think that my little Faerie has got a little big of brand recognition. Instead, I created new swirlies and flourishes for the Fearie to sit on.

Hopefully by the end of the day I can reflect the design changes in my Shoppe and start getting it together on my artist's website.

Also, this Wednesday, I made my "workdesk" so much better.


I FOUND A COMPUTER MOUSE.

This little unused wireless USB mouse was floating around in my Dad's office. Guys, for the past four years I've been using the trackpad on my computer exclusively. (Except for when I pull out the tablet pen). I wear my hands out pretty quickly every day, what with art, jewelry, and typing stuff for school, so using the trackpad can get tiring-- especially when doing design or photography work.

Using an actual mouse yesterday and this morning has been so nice. And my midi sketchbook is perfect as a mousepad.


My actual workdesk is a HUGE FREAKIN' MESS.

But, hey, a clean desk is the sign of an empty mind.

There aren't any big projects on the desk because I've just finished everything up, and I'm waiting for more sheet metal to arrive to work on my next round of custom orders. But I think that the variety of tools and supplies here show you that I've been busy making jewelry using about twenty million different techniques.

Last Wednesday, I shared my experiences with electroforming copper jewelry. I haven't perfected the technique or anything (3/4 of the leaves I've made so far are ugly wrinkly little things) but I did make ONE solid copper leaf and turned it into a necklace.


Below is the leaf I just finished yesterday. I ran it through Liver of Sulfur to oxidize it and then sanded it down to create the brownish look. I can't make jewelry with this one, though, because I hadn't treated the leaf properly before electroforming it and the piece is really weak.


Now I just need to go find some baby maple leaves that are a little prettier as stand-alone pendants.


There's no better way to start the morning than with tea! 

Especially when you get to use your mom's china. I love my giant mugs but sometimes cute little teacups add just enough flair to your day to make it wonderful. (Particularly when you've just finished reading two retellings of Beauty and the Beast and "Be Our Guest" is firmly lodged in your brain).

Now that my blog is (mostly) updated, I've moved on to editing photos. A few of my friends were gracious enough to model for me, despite the fact that I kept sticking the lens in their faces or at their necks and constantly having to apologize for the awkwardness!


Yup, this is the only picture I've fully edited just yet. I promise that not all the pictures have truncated heads... lol!

I'll probably spend the rest of the work day inside or on the porch, editing photos and glancing over my old calculus book (I've forgotten so much and have to get up to scratch for next semester). I hurt my foot (again), this time during Taekwando, so walking around doesn't sound much fun.

It's such a RELIEF to have my summer classes over. Here's to a glorious two weeks of real summer vacation. I've already devoured two books, played six or seven board games with my parents and brothers, watched movies with my little siblings, and hung out with friends. Next semester will be great but I'm soaking in the rest of summer. :)

Well, this turned out to be much more than "What's on Your Workdesk" (it's more like "What's on Your Workdesk Plus Lots of Ramblings) but oh well. :D

Tea and Jewelry

In the midst of studying for the four tests I take today (yes you read that correctly!) I was pretty productive this last week! Here's a quick look at my latest projects. :) 

(Also I need help naming posts, apparently. I was going to name it "New Finished Projects" or "Updates" and then decided to be boringly descriptive and name it "Tea and Jewelry"... oh well. Please tell me that other bloggers have this problem, too!)

New in the Sketchbook:

You can never get a cup of tea large enough or a book long enough to suit me.' - C.S.Lewis
I'm working on a series of small sketches and illustrations for the wonderful Regina Doman. It's actually an old project that didn't go anywhere before-- she's bringing it to life! Regina Doman is the author of some wonderful fiction novels (such as the Fairy Tale Novel Retold series) and fellow fans of hers have been very instrumental in my life.

During her travels, Regina will do "Fairy Tale Tea Parties" in which she will give talks and sign books at small tea parties hosted by fans. The illustrations are for a tea party booklet!


This is a work in progress shot from my Instagram account (which y'all should follow for more behind-the-scenes of making art and jewelry) with a couple more of the sketches.


 New in the Shoppe:


Here's a peek at the newest listings in my Shoppe. I made some pieces for custom orders, too.

Bluebell Chainmaille Bracelet-- I'm especially proud of figuring out a brand new chainmaille weave! (Well, brand-new to me!)
Aurora Rhinestone Pearl Earrings -- designed to go along with my Princess Aurora circlets and cuffs
Blue to green ombre chainmaille bracelet
This bracelet took quite a bit longer than most pieces I make using this weave, since it is too tiny! It's more feminine and elegant, and of course I made this with my all-time favorite color pairing: bright, non-tarnish sterling silver, and a huge variety of shiny blues and greens!
Autumn Red flower spray leaf hair clip -- that's a really long name for this piece but at least it's descriptive. 
Here's the same hair clip on a lovely model!
Mint Green chainmaille flower bracelet. I LOVE combining the ultra-modern, sleek look of colorful enameled wire with the historical look of chainmaille and the whimsical fun of my signature leaf flowers!
Golden Galadriel Star Flower Earrings-- with green crystal dangles
Rustic Celtic Copper Cuff
OK, so this one is a bit of a cheat-- it's not a new item in my Shoppe. It's been up for a couple weeks. But during a fantasy-themed photoshoot, I photographed this stunning model wearing the copper cuff from Eowyn's Jewelry Set. The gown was handmade by a friend of mine, and the sword is a replica of Glamdring-- Gandalf's sword from the LotR movies!

Summer Greens Enchanted Forest Earrings. The Enchanted Forest earrings seem to be a favorite-- they are at once elegant and elven. I normally make them in solid colors, but these various shades of green just called to me. Also, can I geek out about this photograph? I don't know how I got the sunray to be "just so" but I'm loving it!

On My Workdesk Wednesday

I'm staring a new, regular blog feature: Workdesk Wednesday.

It is inspired by the WOYWW link-up over at the blog Stamping Ground, but I'm going to use it as a personal challenge to keep this blog updated on a weekly basis!

(You should check out WOYWW to see the workdesks of other artists and crafters!)

Every Wednesday, I will take a picture of the workbench in my garage studio at home, or my dorm room at school, or one of the tables at my school's studio.

So, what have I been up to this week?

What's On My Workbench:


What's this? A gigantic power supply running electricity through an acid bath?

Ooooooh, yeah. After learning how to etch and oxidize copper using all sorts of chemicals, I just had to keep going. This technique is my largest monetary investment into supplies... so I'm really hoping it works well. I'm having some hiccups right now.

I'm learning how to electroform organic materials! This means that I will be able to literally turn real leaves into copper. Well, not literally. What I'm literally doing is plating them in a nice, sturdy coat of copper.

I can then take the copperized leaves and patina them in various colors to make jewelry. I'm also looking for a way to create a sparkle dip that doesn't look cheesy, so I can make the leaves a little iridescent.

Hiccup #1: I can't skeletonize the leaves very well. I've been boiling the leaves in baking soda, soaking them for a day, and scrubbing gently with a toothbrush, but all I've managed to do is tear the leaves apart. If anyone has ANY tips, please let me know!

Hiccup #2: The conductive paint is taking some trial and error, as I can't seem to get an even coating and only parts of the leaves are turning copper.

Hiccup #3: The rectifier I bought online was defective and I had to return it. I'm borrowing this one from my dad's work but it's only for a couple days. They recently got an upgrade to a stronger power source, so maybe I can buy it from his boss?

(edited)

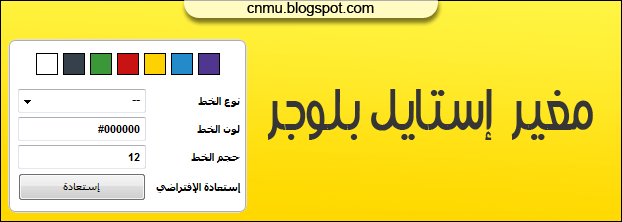
مغير ستايل بلوجر

Blogger Style Changer
أعطي لزوار مدونتك حرية أكبر في اختيار مظهر يتلائم أكثر مع ذوقهم وذلك عبر إضافة مغير الستايل هي إضافة تسمح للزائر بتبديل لون خلفية المدونة أو لون الخطوط او حجم الخط ليكون مناسب اكثر لذوقه الخاص خصوصا مسألة لون وحجم الخط تفيد كثيراً لاصحاب ضعف النظر أو من يجلسون على مسافة كبيرة ويحتاجون رؤية الخطوط بشكل أوضح الإضافة بسيطة وسهلة التركيب كل ماعليك فعله هو إضافة الكود التالي في آداة HTML/JavaScript والباقي يعود لزوارك يمكنك تجربة الآداة أولا من الرابط التالي


نوع الخط
           
       
لون الخط
حجم الخط
إستعادة الإفتراضي


دمتم بكل ود

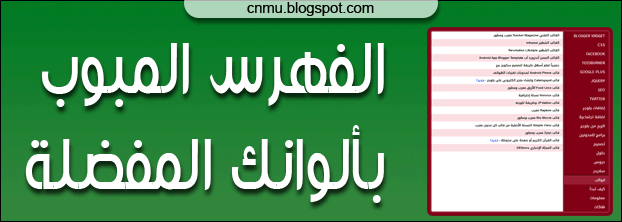
الفهرس المبوب بألوانك المفضلة

Tabbed Blogger Site Map widget
فهرس جديد ينضم لإضافات الفهارس السابقة التي أضفناها لكم يتميز هذا الفهرس بانه يعمل بتقنية التبويبات أى يعتبر كل قسم تبويب مستقل بمواضيعه الخاصة ويظهر المواضيع التابعة للقسم عند تنشيط التبويب الخاص بها تم ضبط مظهر الفهرس ليكون سهل التعديل عليه وسيتم شرح طريقة تنسيقه باللون الذي تريده لكن أولا يمكنك معاينة الفهرس من الروابط التالية
كود الفهرس أضفه في صفحة ثابتة بعد تحويل صندوق الكتابة من وضع تأليف الى وضع HTML
احذف أى شئ موجود به ثم اضف الكود


يرجى الإنتظار ...


أول شئ عدل هذا الرابط http://cnmu.blogspot.com  برابط مدونتك
تم اعدادا الفهرس باللون الأزرق كلون افتراضي كونه من أكثر الالوان انتشاراً لكن يمكنك تعديل الألوان بإتباع التالي
هذا اللون #004DAC هو لون خلفية التبويبات
هذا #1E78DF هو اللون العام للقالب يفضل أن يكون درجة أفتح من اللون الذي ستختاره للخلفية
وهذا #D5E8FE هو لون خلفية روابط المواضيع وهذا يفضل ان يكون درجه فاتحه جداً من اللون لاذي ستختاره
الرقم 20 هو مقاس شريط التبويبات
والرقم 80 هو مقاس خانة الروابط
ان صغرت أحدهم قم بزيادة الآخر والعكس صحيح المهم أن يكون المجموع الكلي 100
وهذا #F2000C هو لون كلمة جديد
دمتم في امان الله

Elven Photoshoot | Sneak Peek

Warrior royalty mother and daughters
On the 4th of July my close-knit extended family stayed at our house for a few days, and I convinced four of my cousins and two of my aunts to dress up in my Elven dresses and the Lord of the Rings swords and staffs for a quick photoshoot.

Fun fact: the girl in the middle of the top picture dyed her hair with Kool-Aid!

Elegant Elven mother and daughter
My relatives are so photogenic that I deleted barely twenty of the three hundred photos I took.

Going on a journey

Three rings for the Elven kings under the sky...
Before the photoshoot we had doodled "henna" on ourselves. We used cheap eyeliner and sprayed it with extra-strong hairspray. The "henna" lasted for two days!

Yeah, don't get on our bad side.
REALLY don't get on our bad side.
Next week, look for a big masterpost with quite a few of my favorite images from the photoshoot!

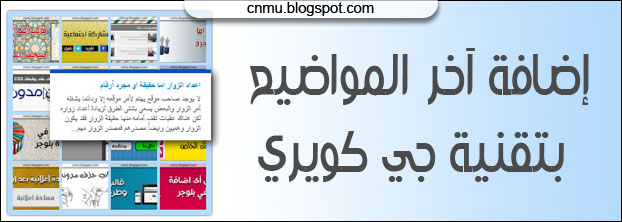
اضافة آخر المواضيع بتقنية جي كويري

JQuery Latest Posts Blogger widget
إضافة آخر المواضيع بتاثيرات مميزة بتقنية جي كويري JQuery يميز تلك الإضافة المساحة كونها تعرض عدد كبير من المواضيع في مساحة بسيطة ويمكن أيضاً تنسيقها بما يتناسب مع مدونتك سواء في مقاسات المصغرات او الألوان وهو ما سنتطرق اليه في شرح الإضافة ويمكنك في البداية الإطلاع على الإضافة ومعاينتها من الرابط التالي
شرح التركيب والتنسيق
أضف الكود التالي في آداة HTML/JavaScript


أول شئ الكود الأخضر احذفه ان كان لديك رابط مكتبة جي كويري على مدونتك
استبدل هذا الرابط http://cnmu.blogspot.com  برابط مدونتك
هذا 11px Arial,Sans-Serif هو نوع الخط وحجمة في الإضافة
الرقم 16 هو عدد المواضيع اختر العدد الذي يناسبك
اللون #B5DBFC هو لون خلفية الإضافة
هذا 280  الرقم هو مساحة عرض الإضافة
الرقم 66 هو طول وعرض الصور
هذا #0051C3 هو لون الخط العلوي للنافذة التي تظهر عند تمرير الماوس
الرقم  200 هو عدد أحرف الملخص في النافذة
هذا #0A85BE لون عنوان الموضوع في النافذة
تم بحمد الله

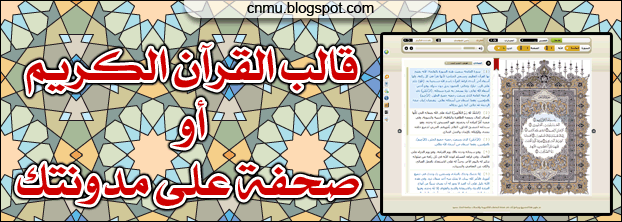
قالب القرآن الكريم أو صفحة على مدونتك

Holly Quran blogger Template
في موضوع سابق تطرقنا لطريقة اضافة القرآن بعدة طرق لمدونتك وكان في احدى الطرق اضافة كبيرة تضاف في صفحة مخصصة لكن توقف السكريبت الخاص بها ولهذا تم ازالتها وها نحن نستبدلها بإضافة أقوى كثيراً موسوعة قرآنية كاملة على مدونتك أو قالب مستقل ان اردت مدونة مستقلة للقرآن تكون لك صدقة جارية أولا معاينة الإضافة

قالب القرآن

كل ما عليك فعله هو 

  1. انشاء مدونة جديدة
  2. فك الضغط عن الملف الذي حملته
  3. تفتح ملف القالب المسمى Template.xml
  4. تنسخ كل ما فيه من محتوى
  5. ادخل الى تحرير القالب في المدونة الجديدة
  6. احذف كل شئ والصق ما قمت بنسخة ثم احفظ القالب

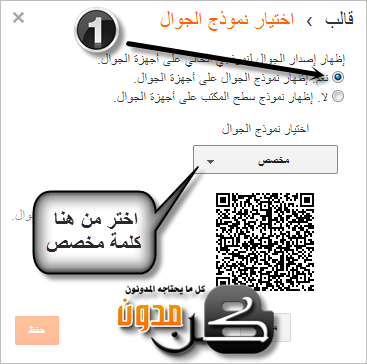
هناك اعداد واحد أخير يخص القالب وهو اعداد نموذج الجوال
من صفحة القالب اضغط على ايقونة اعدادات نموذج الجوال ثم طبق الذي بالصورة

Blogger Mobile Settings

صفحة القرآن

بما إن مساحة الصفحة كبيرة فلا يمكن ان تستوعبها مشاركة لذلك سنقوم بإزالة كل شئ من الصفحة بحيث تصبح فارغة تماما وتكون بها موسوعة القرآن بالمساحة الكاملة

الخطوات

أنشئ صفحة ثابتة جديدة وسميها القرآن الكريم مثلا أو اسم مناسب
لا تكتب بالصفحة شئ نريدها فارغة كما هي
ابحث عن الوسم
بعده مباشرة اضف الكود التالي