Jewelry Photography Tips

I've had many people ask how I take such crisp pictures of my jewelry.

They want to know how to keep their photos from looking like this (or much, much worse).

Click to enlarge.... but I don't think you want to.
In order to have a jewelry blog, or to simply sell jewelry online, you basically have to become a mini-professional photographer.

I don't use any fancy, high-end equipment. I can't afford that. But over the past few months, I've learned how to take some decent pictures. It took alot of trial-and-error, and maybe I can save some of you the pain!

How to Take Pictures of Jewelry 
(...and many other things)


I'm absolutely no expert on this subject, but I thought I'd share some tips that I've found useful. These are the exact techniques that I use to take pictures such as this:


The Camera
_______________________________

You don't have to spend big $$$ on a camera to take decent jewelry photos. I use a 10 (or more!) year old camera that used to belong to my grandparents. It's old as far as gadgets go... It's kind of falling apart through constant use, and it's pretty outdated.

My camera, taken with my dad's iPhone
Any digital camera nowdays will take decent pictures of jewelry. You just need to know how to work with it.

Gee, I've learned that iPhones can take great macro photos (if slightly grainy in certain lights), and those are quintessential point-and-shoot cameras. No settings, no nothing!

(I'm not excluding film cameras here... I just don't know how to work them, and it would be a pain to get those photos online!)

See the picture of my Olympus camera to see what an iPhone can do

There are two things you can't skip on: the Macro setting and the ability to turn off the Flash

The Macro Setting
_______________________________

(Almost any digital cameras from the last 10 years has this setting)

The macro setting tells the lens to focus on the closer items rather than the farther ones. Totally indispensable. On most cameras, this setting is found somewhere near the dial or viewing screen. Some cameras even turn it on automatically.

Look around carefully for this fella.      Reader, meet Macro Flower.      Macro Flower, Reader.      You're best buddies for life.
 The macro setting is the best way to get an in-focus close-up shot. Some cameras have better macros than others. Some let you get within an inch of the subject. My camera won't focus unless I am in a range of 2-3 feet from my subject, and it won't focus if I zoom in completely. This just means that I have to crop the images.

Other Settings
_______________________________

If you have a point-and-shoot camera, you don't need to learn about other settings. You can take decent photos with just the macro turned on.

However, I suggest reading your camera guide to see if you can change other settings.

When taking pictures of jewelry, I usually let my camera know if the lighting is incandescent (yellowish), florescent (white), sunny (natural and bright), or cloudy (natural and dull). I only mess with other settings for non-jewelry photography.

Turning Off Flash
_______________________________

I know, I know. If your lighting isn't great, you think you need to turn on flash.

BUT IT WASHES YOUR PHOTO OUT!

Everything looks all white and dull and flat!

(Sorry, this is a peeve of mine! I still can't convince my dad of this... but then, he takes technical photos for work, and I take artsy photos.)

Turn off the flash. If you are taking a macro shot, the only thing the flash will do is overwhelm the subject. Turn if off, and find proper lighting. If you can't find proper lighting... take it without flash and edit on photoshop.

(Okay, there are times when it is appropriate to use flash. And people with fancy, removable flashes can probably put them to good use. Bouncing the flash is good, too. But unless you are an extreme photographer, go the safe way and turn off the flash.)

Lighting
_______________________________

The number one rule is to ensure that your subject is well-lit.

Use natural lighting when available. Simply moving your subject next to a window and turning off the flash can increase the quality 100 fold!

I am still learning how to put lighting to good use. You can see my trial-and-error progression by looking through old posts on my blog.

I like to set a piece of white paper next to a window. If the day is sunny, the outdoors is usually to bright to work with.
What if it is dark or cloudy?

My T-shirt, lamp, and window studio :)
An easy fix is to shine a lamp at your subject. Oftentimes, the light is too bright, so diffuse the light by taping a piece of computer paper over the light bulb. (Be careful not to do anything dumb, such as setting the paper on fire. Keep an eye on it.)

Shadows are very difficult to deal with. I just move my jewelry around until the lighting is decent... As you can tell, I'm still working on getting rid of those pesky dark shadows.

I recently made a lightbox, which evens the lighting and background. I LOVE this thing!


A handmade lightbox

If you want to spend some money, you can get a good-quality, professional lighting setup.

A Steady Camera
_______________________________ 
 It goes without saying that your camera has to be steady in order to get a crisp photo. Use a tripod, mini-tripod, box, book, or one of your limbs to prop the camera. :)

Setup 
_______________________________ 
 Alrighty, you have a digital camera, found your macro setting, turned off the flash, and found good lighting... Now what? Before you press the shutter button, check your set-up!

Background: You want a background that compliments your jewelry (or other items) without overwhelming them.

Many people opt for the white background, especially when taking photos for online stores such as Etsy and Artfire. You can use posterboard, computer paper, or even a T-shirt to acheive this effect.

Don't be afraid to be creative, though. I've seen some beautiful jewelry photos where the jewelry is lain on a book, handwritten note, scrapbook paper, or even a cup! (Cups are wonderful for taking pictures of earrings, by the way.)


Props: Do you want anything besides the jewelry to appear in the picture?

You may opt for the plain white background, but sometimes adding a flower, rock, book, mannequin, or other item both
1) adds to the "feel" of the jewelry image, and  
2) gives you something to lay or drape the jewelry on.


Sometimes the size, style, or use of a peice is not apparent unless it is shown on someone. Saying that a necklace is 18" long doesn't pack as much of a punch as a picture of the jewelry in use.


Angle: You may want to take a flat-on shot to show every bit of your jewelry piece, but "artsy" is the name of the game.

Shoot from an angle. Head-on photos are OK as secondary photos for people wanting more information on the overall look, but presentation is the key.


The left photo is very pretty, but the picture on the right should be the "featured" photo.


Editing
_______________________________

No matter how good your photo is, it can use editing. :D Many times an image will look wonderful on the camera display, but dull and uninspired on the computer.

Using Photoshop, Paint Shop, GIMP (a completely free, fairly powerful editing software), or other software, go crazy! Crop, change the contrast, brightness, color tone, etc.

I've had Photoshop for a few months, and knowing my camera's faults and the basics of the software, I now have a routine for quick fixes:

~Open the photo
~Auto Contrast
~Auto Color
~Auto Tone
~(If one of those gave a bad look, I undo it and sometimes edit that manually)
~Use "curves" and/or "levels" (depending on the lighting/background) to adjust the brightness of various hues
~Use the "band-aid" tool to remove any dirt or small unwanted items
~Use the "blur" tool to blur the background if it overwhelms the subject
~Crop
~Save

Some pictures take a bit more work, but my basic "routine" only takes a minute or two.

Before
After

Take a TON of photos, and Have Fun!
_______________________________ 

I take, on average, 1.5 photos for every good one that I use on my blog or the Shoppe. For each item in the Shoppe, I take 1-4 photos... you get the picture. Take lots of them. :)

(Even if your camera, like mine, takes 30-60 pictures, max, depending on which memory card is in it).

And have fun with it!


What do you do when you take photos? Any new tips? Have my tips helped you out any? Questions? Leave a comment!
Cyber Monday, 10% off!

For those of you who missed the Black Friday sale, Cyber Monday is here! 
10% off EVERYTHING in the Shoppe!
Including new items that were added this weekend!


(Regular posting will begin momentarily. Keep your eye open for tips on photography, how to make a charm bracelet, and more!)

How to Make Painted Washer Necklaces


The latest DIY (do it yourself) tutorial is how to make washer necklaces!


These necklaces are pretty popular... I've had so many people ask what I use to make them, because the paint shimmers so beautifully. I always feel kind of sheepish and kind of genius when I say, "It's just fingernail polish!"


You will need:
Fingernail polish in fun colors
Clear fingernail polish
Washers 
Toothpicks
Paper towels to keep your workspace clean


My sister painting her washer necklace
 Step one is to put down a base coat. Feel free to do textures-- they work beatifully. 

You can rub the polish on smoothly, dab in little circles, create textured lines...

Some textures
Your base coat can be two colors, like the one my sister was working on!

Once the base coat has dried, paint with another color and add polka dots, stripes, etc. I like go go through with a toothpick and do a painting or bit of calligraphy.


You don't even have to wait for the base coat to dry to put on other colors! Here you can see a wet base coat with colorful polka dots. I then used a toothpick to blend the colors in for a fun and spunky pattern of swirls!

Next, and this is very important: once the paints have dried, coat your entire washer with clear fingernail polish. This protects the paint from chipping off.

The front...

Silly me forgot to take pictures before the craft fair, so I snagged these real quick. Click to enlarge and see our designs!

...and the back.

To put the necklaces on a cord, string some cord through the washer and tie it off. Then come through with your chain, using the cord to attach it. I didn't explain that very well, so just click to enlarge the picture above. The washer on the left, with the black and yellow cord, shows what I mean fairly well.


These pictures show how pretty the fingernail polish looks in different lighting. Both pictures are of the same washer!


Such a fun and easy project! Let me know if you try it! Leave a link in the combox (comments box) with a link to your own blog post or to a picture! 

Black Friday Sale

It's that time of year again... with people trampling through stores like a pack of angry buffalo hungry for a sale.

It's also the time of year to start thinking about Christmas presents for all of your friends and family!

I'd like to pass on the buffalo, if you don't mind. But you still get the sale. And some fun, unique Christmas presents (if I do say so myself).

That's right-- I'm doing a Black Friday sale!


How would you like 10% off everything in Shealynn's Faerie Shoppe?


The sale will last all day on Friday, November 26th. Everything means everything... including all the brand-new, one-of-a-kind items I just uploaded!

Do you like my Evenstars? Get 15% off on Black Friday!

 
(Because I have a Basic account on Artfire, I can't automatically make the Evenstars 15% off. You will have to contact me via Artfire or my new email ShealynnsFaerieShoppe [at] gmail.com. I will manually mark down the price for you. Please note that if you do this, it might be Sunday or Monday before I am able to do so. So long as you contacted me on or before Black Friday, you get the 15% off.)


Please note that this is the first time I've tried to do a sale... so let's collectively hope that nothing explodes. K? :)


Visit Shealynns-Faerie-Shoppe's ArtFire Shop

Your regular crafting posts will begin momentarily...

I'm Impressed at the Stats... :)

I'm really excited that so many people are interested in my blog!


free counters
I've got this little widget at the foot of the blog, which keeps track of how many times people look at my blog. I've had over 8,000 pageviews!!!!!!!! Of course, some of that is you, my dear followers, who check my blog regularly. But, still! I'm so excited! :)


Shealynn's Faerie Shoppe

My facebook page has 80 followers!!!
Don't forget to fan me on facebook. I'll keep you updated on new events, giveaways, and sales on my Shoppe! Don't worry, I don't spam-- lately I've only been posting once a week, and I make it a point never to post more than once or twice a day.

Fan, soon, because you'll find a giveaway there in the near future. ^_^


 The RSS feed has 40 subscribers...


Look over to the right, in the sidebar, and you'll see the Blogger Followers widget. 29 fellow bloggers follow my blog!!!

Look over to the right, in the sidebar again, and you'll spot more options for following, including receiving email updates!

Again in the sidebar (sorry, some of these widgets are Blooger built and I can't move them inside my post) you'll see my Popular Posts (the posts with the most pageviews). I find it funny which ones are so popular... The drawing of Hermione's Dress somehow got ranked fifth in Google's image search for queries such as "Hermione Yule Ball," "Yule Ball Dress," and some others. (Thank you, Blogger Stats, for letting me know that! lol!) Actually, I get ALOT of people coming through Google searching for things like "Elvish crafts." Hopefully they will be pleased with what they see here at Shealynn's Faerie Shoppe!


Anyways, I just had to share that. Back to regular crafty posting soon... :D

My First Craft Fair

My table display, set up in our school room.
A few weeks ago, my Mom forwarded me an email from a homeschool group: they were having a craft fair!

"You might want to think about doing this," Mom said.

Of course I wanted to do it! And thus it was that last Monday we drove out to this funeral-home-turned-gathering-center with a Rubbermaid tub full of... well, every jewelry that I have made and didn't plan on keeping. :)

The tables were free, and it sounded like it would be a mix of cutesy little kids' wares and parents' crafts. My six year old sister, Adelynn, made her own "Shoppe"-- "Adelynn's Princess Shop."

The day before the craft fair, I took over the homeschool table and made a beautiful little display. (See the results above!)

I wasn't expecting round tables!

The real deal!
(Please excuse the picture quality. Silly me forgot the camera's memory card! Mom snagged these with her phone camera. You'd better thank her for remembering that, or else you, dear readers, would have no pictures of any quality!)

Please excuse how crazy I look and see how pretty my little sis is. :)
I didn't really know what to expect; after all, this was not a real craft fair. When we arrived, I was surprised at how many people came to sell items.

Most of them were cute little kid crafts-- some very creative. For instance, marshmellow guns? Rings made out of brads? Pretty cool. Some people made soaps, some made tote bags, my co-op's art teacher did calligraphy... one lady had some amazing "good deed bracelets" (sacrifice beads made into a bracelet!) Mom bought this thing called a rice bag from someone-- it. is. awesome. I'm going to make some myself and do a post on them. ^_^

So the craft fair turned out rather well; I made five or six small sales and nearly everyone took one of my business cards. Adelynn sold two things and promptly spent that money on two little things from two other little girls. :)

I did notice that the only people there were the people selling things and their families. Most people came with full tables... and left with nearly full tables.

Packing everything up!
I certainly got a lot of experience from this craft fair! One important thing I learned: never forget hyperallegenic ear wires for earrings. I missed out on two sales because of that... In the future, I will always bring some gold plated, silver plated, and niobium ear wires for people who want them. :)

Have you ever been to a craft fair? Which displays and wares were your favorites? Have any tips? Please share in the comments box!

I am now officially hooked. I shall keep an eye out for craft fair opportunities-- and I might even bring some original artwork and some prints!

Do you want me to do a post on how I displayed the jewelry? I've already taken things apart, but I can show you the *drumroll* secrets. (I would make a terrible magician, lol!) For instance... I spent $0 on it!

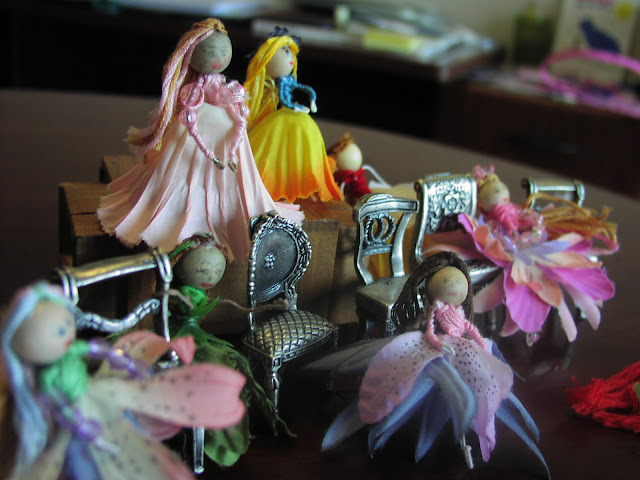
Flower Fairies

Or, What I was Doing When My Camera Broke

A flower Elf. Arwen, maybe?
Revel in the beauty of that picture. T'was the last my nice camera ever took.


Some of you may remember the post where I explained that my camera had broken. It was a fluke, really; I was holding the wonderful camera, taking pictures out in the yard of my flower fairies, when the camera slid from my hand and hit the dirt. (What gets me is the fact that it managed to fall despite the fact that I had wrapped the strap around my wrist!)

Dad says that I managed to jiggle it's insides just enough and in the only way that it can't be fixed. It was a very, very nice camera. T'was an old Canon of my grandparent's. RIP awesome camera.

Anyways, that was a long time ago. I'm back to using the 10 year old Olympus (again from my grandparents!) It's a nice camera, but it's starting to get old age lines. For example, the memory cards? Soooo outdated. Startup time? Sooooo long. Macros? Sooooo difficult to take. Thankfully I've learned it inside and out, so I can make it do what I want. And if it can't do it, well, I've got Photoshop now!

Now that we've got the camera story out of the way, want to hear about the Flower Fairies?


My aunt (or grandparents, I forget) gave me a book/kit from somewhere (Klutz, maybe? I forget) for Christmas (I was nine or so.... I forget). I spent hours making these little fairies and teaching my friends to make them. (Thankfully I have not forgotten how to make them...  heehee)


I made these three, the Water Lily fairy, the Lord of the Rings Elf fairy, and the Bride fairy, (along with a bajillion others) in 4th grade when I was home from school for a month due to two surgeries.


I made alot-- these are just the ones that I didn't give away. ^_^


Not content with fairies, I made a mermaid.

Click to enlarge
I've thought about making Wedding flower fairy sets for my Shoppe. I would make it all custom order, with the hair the color of the real people, the wedding dress in similar style to the real one, and using the colors in the actual bridesmaid dresses. Wouldn't that be sweet?
What do you think?


Oooops! Business Cards

I just realized that I put the wrong URL for my Shoppe on my business cards!

In case you got to my blog from the business cards, the real Shoppe address is:


The link on the cards pulls up a 404 Not Found error.

Incorrect Link to the Shoppe
I'm so sorry for the confusion!

Apparently I had forgotten to type /users/ on the card. (Which is strange, because I totally remember not having that in the URL, but oh well!) Now I've got some 20 leftover cards to fix. I might just stick little stickers on the back so I don't have to waste perfectly good cards. :)

Yes, I am weird...

...as can be seen in these pictures.

What You Can Do With Charm Bracelets
My first charm bracelet. { HERE }
I've made two charm bracelets. They are, without a doubt, some of my favorite bracelets, ever.
They are so playful!

Wear two on one wrist!
Bored? Mess around with the beads!

I can't help but jiggle my wrist when I wear these...
Get creative...

Attach the clasps of the bracelet to the clasps of a chain for a fashionable necklace!
And go bold!

Two bracelets and a chain-- overboard? Not so much!
You've got creative and bold... Go unique!

Just two charm bracelets attached together make a great choker necklace.

I've seen this style around somewhere...

It's called layering.

Bored? You are never, never, never ever bored when you've got glasses with magnetic sunglass clips... and charm bracelets.

Muahahaha. Can YOUR glasses do that?
...and, for all that, the only way I usually wear charm bracelets is one on a wrist. The normal way.

(Well, I do stick it on my glasses an awful lot... You know, during long, drawn out games of Monopoly?)


*Check out my new tutorial on how to make these charm bracelets!